Today we'd like to answer a question some of you have asked us before, which is how to make ice blocks for coolers.
As you know, the basics of making ice are pretty simple. Ice is frozen water. So it should be all about putting some water in a container, putting the container in a freezer, and letting the laws of thermodynamics take it from there, right?
Well, I have to admit, I have never undertaken a task as complicated as DIY ice blocks.
I think they should have a short course on this. Maybe we’ll make a video tutorial one day on our site for viewers. For now, however, we’ll have to make do with a blog post.
So, how to make block ice for coolers? The short answer is “very carefully”. The long answer is right below!
How to Make Ice Blocks For Coolers
First, Why is Block Ice so Popular?
If you ever wondered on how to keep food cold when camping, then know this: using block ice can be the best bet you can make – assuming you've got equipped with a good camping cooler, that is.
Block ice is a great option for food storage because of how much longer block ice lasts over ice cubes.
This is a boon, especially if you’re going to be out on your camping trip for a long time, and you have lots of perishable food whose perishing you would like to delay as much as possible.
 It all boils down to a little concept known as the surface area to volume ratio.
Think of it this way: if something is small, then a large proportion of it consists of nothing but the surface area. It’s mostly surface and little actual body.
A small ice cube is mostly surface, since it’s small but has a large surface area relative to its size.
That means it’s going to melt faster because a lot more of it is exposed to the warm air.
A block of ice, on the other hand, has a small surface area to volume ratio. The larger the block of ice, the better.
Most of the body of the block of ice isn’t exposed via the surface. It, therefore, takes a lot longer than an ice cube to melt.
Coincidentally, it also takes a lot longer than an ice cube to form from the water in the mold, but we’ll get to that in a bit.
For now, I’m singing praises for ice blocks.
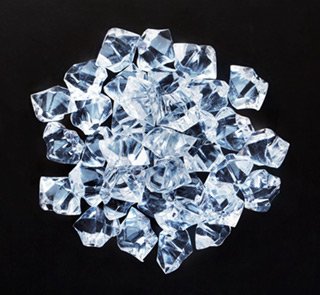
Cooler Ice Blocks vs Crushed Ice
Okay, so we know about the major advantages of block ice. Now, let’s see if it’s really better than crushed ice or ice cubes.
 Because of its ability to retain ice longer, block ice is excellent for long term storage of perishable food.
It’s particularly good for adding to the longevity of fish, meats, and games, among others. This makes it a natural option.
However, there is a downside. Crushed ice, while it melts much faster than block ice, also cools food much faster.
Remember, crushed ice has a large surface area to volume ratio, which means it will more readily absorb heat from whatever it is cooling.
The same quality that causes crushed ice to melt so fast is also the quality that causes it to cool so fast.
Block ice, on the other hand, has a low surface area to volume ratio. It takes a long while for it to absorb all the heat from whatever it is cooling.
Are Ice Blocks Better for Coolers?
A good solution to this problem is simply to pre-chill the food before you put it in the cooler.
Actually, while we’re at it, you should pre-chill the cooler itself as well. Toss the food in the freezer and let it stay there for at least 6 to 12 hours before the actual trip.
As for the cooler, it needs a solid 12 hours of pre-chilling before the trip. That way, when you’re packing your cooler, you’re not looking to freeze the food first. You just want to keep it frozen, which block ice is excellent at.
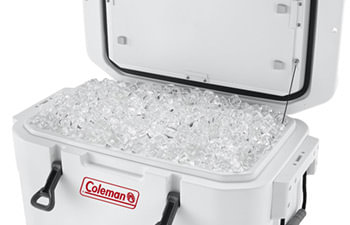 Another possible solution is to mix block ice with crushed ice in your cooler.
You can have the block ice at the bottom and the crushed ice mixed in with the food on top.
That way, the crushed ice takes care of chilling the food while the block ice ensures temperatures stay steadily low.
Throwing in a few good quality ice packs wouldn't be a bad idea either.
You can also buy a windshield sunshade and cover the cooler with it, especially if you’re using it for game meat of fish. This helps keep it cooler for longer.
It should be noted that this method involves certain sacrifices related to the capacity of your cooler. Since you’re investing so much space in your ice, you’ll naturally have less available for your food.
A bit of clever packing (layering the food between layers of ice, for example) might help, but only so much.
You should either get a large cooler or make some concessions for space. Alternatively, you can just pre-chill the food and avoid the headache altogether.
How To Make Block Ice for Cooler – DIY Ice Blocks
DIY Molds: Bottles, Milk Jugs, Buckets, Ice Cream Containers, etc
I would put all of these in the same category because they are, for the most part, largely closed containers. They are high, relatively narrow, and they don’t give the water much room to ‘breathe’.
Plastic Bottles
Take bottles, for example. Bottles are actually a pretty good option for making ice block molds. They allow you to place the ice in the cooler while it is still encased in plastic since you don’t need to take it out of the bottle.
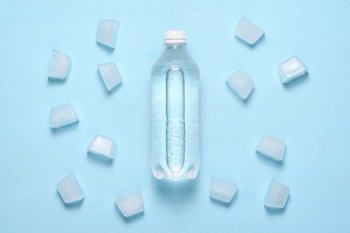 Assuming you have tightly capped the bottle, when the ice inside it melts, you won’t have to worry about water everywhere in your cooler.
This is great if you’re looking to put dry foods in your cooler and you don’t want them getting soggy.
Once the water has melted, you can also use it as drinking water.
So your water bottles double up as cooling ice, saving you loads of space.
The problem is that bottles are mostly made of either plastic or glass.
The plastic bottles will bow outward as the water expands in the freezing process. This will make for a very ugly bottle, if you’re the kind of person who’s into aesthetics.
Moreover, if you make the mistake of filling your bottle to the brim, the plastic might actually crack, allowing any unfrozen water to spill out.
Never fill the bottle to the brim. Leave between an inch and 2 inches for the water to breathe.
The same applies if the bottle is made of glass. The glass won’t have the allowance to bow, and so it will crack or break altogether, spilling out whatever unfrozen water it had.
The same applies to milk jugs, which are really just glorified bottles.
Plastic Containers
As for containers, such as an ice cream bucket, size matters. You should first figure out how large you want your ice blocks to be, and then figure out whether a container of that size will actually fit into your freezer.
 Your freezer is a real constraint to this process, as I have painfully learned in the past.
I once wanted some really large ice blocks, so I went to the store and bought a large bucket. I happily put water inside it and carried it over carefully to the freezer, only to realize there was no way it was going to fit in there.
So I had to go back to the store and buy a slightly smaller one that was more likely to fit in my freezer.
The good news is that it did, though I did have to remove most of the other things in the freezer and squeeze whatever was left in various nooks and crannies.
That’s not the end of the story, however. The other part of it is that I had filled the bucket with too much water and it bowed and cracked.
Not only did some unfrozen water spill out and form a one-inch thick layer of ice on the bottom of the freezer, but the plastic was expanded so much by the freezing of the ice within, that it practically got stuck against the walls of the freezer and removing was one of the hardest projects I’ve ever undertaken in my life.
That little story leads me to the next tip I have learned over time: Don’t fill your buckets to the brim, or even halfway for that matter, if you want the ice to freeze decently and fast.
The most important thing here is that you want the ice to freeze in less than a month of freezing time. Believe me, block ice can take its sweet time to freeze.
The trick I learned was to fill in a bit of water, let it freeze, and then add more, and so on. This allows the ice to freeze much faster, plus it doesn’t expand as egregiously, morphing the container in the process.
It works surprisingly well for bottles as well, plastic or glass.
Materials
Speaking of materials, the best material you can freeze your block ice in is metal. The ice won’t stubbornly stick to the sides of a metal container, making it easy to remove it from its mold.
However, metal containers are hard to find, and I’m yet to see a full metal bottle. So the other options are plastic, glass, and rubber.
Glass containers are a hazard because of how brittle glass is. It’s far easier for a glass container to crack or shatter completely from the expansion of the water as it freezes.
I would say to use glass with care and apply the technique of freezing a little water at a time and adding more as it freezes.
As for rubber, it’s just as hard to find a good rubber container as it is to find a metal one, though you might be able to find a silicone one, which I’ll talk about in the next section.
I’ve also never heard of a rubber bottle.
Ready-Made Block Ice Molds
One particular gap in the market is that there aren’t any ready-made ice block molds in stores, especially those large ice block molds.
You can easily find ice cube trays and molds, but ice blocks seem to be largely a DIY project at the moment. This is a great opportunity for entrepreneurs, and we’re hoping to see something in the market soon.
However, there are some hacks you can take advantage of that are almost equivalent to getting a ready-made ice block mold.
Silicone Bread Loaf Pan
This is the best hack we’ve found so far. Silicone is excellent for ice block mold material because the ice doesn’t stick to it. The shape of the bread loaf pan is also good for making regular ice blocks.
The only downside is that it’s hard to move the pan when it’s full since the water can easily spill.
A good way around this is to place it in the freezer and pour water into it while it’s there. Remember to pour some at a time, let it freeze, and then add more as required.
Rectangular Food Pans
These are also a great option for making regular block ice, and the instructions for use are the same as with the silicone bread loaf pan.
There are actually lots of other great options, including hospital plastic bath basins, Cake pans, Tupperware containers, and even a PVC pipe cut in half.
Really, the only limit here is your creativity, though most of the general tips above hold.
How to Make Block Ice for Coolers – The Bottom Line
And with those tips, you should already know how to make ice blocks for coolers. We hope you'll now be able to make your own block ice from just about any mold.
Remember not to fill the container to the brim. In fact, freeze the water a bit at a time and add more as needed.
And also remember to pre-chill your food. If you can’t have a healthy mix of block ice and crushed ice for maximum cooling effect.
We wish you a cool time!
Disclaimers
All product names, logos, and brands are property of their respective owners. All company, product and service names used in this website are for identification purposes only. Use of these names, logos, and brands does not imply endorsement.
It is our policy to make every effort to respect the copyrights of outside parties. If you believe that your copyright has been misused, please provide us with a message stating your position and we will endeavor to correct any misuse immediately.
Some of the links in this post are affiliate links. As an Amazon Associate, we earn from qualifying purchases. This means if you click on the link and purchase the item, we may receive an affiliate commission, at no extra cost to you. This helps us keep this website alive. Learn more here.